
The Right Way to Fix Your Car’s AC System
Step-by-Step AC Diagnostic Strategy
Quick Summary (Read This First)
If you want to fix your car’s AC correctly, you have to stop guessing and start testing. In my experience, most failures come down to low refrigerant caused by a leak. After that, the next most common issues are airflow problems or internal restrictions—not a bad compressor, as most DIYers assume.
The real key to diagnosing your car’s AC problem is understanding the system you’re working on. You need to know whether it uses an orifice tube or an expansion valve, and whether the compressor is clutch-type or clutchless and variable-displacement. Once you identify the system, pressure and temperature readings start to make sense, and you can use them to zero in on the root cause instead of guessing.
You also can’t overlook refrigerant oil. If the system is low on oil, the compressor can be damaged quickly. When I diagnose a car’s AC problem, I follow a structured process that lets me pinpoint exactly what’s wrong—so I can fix it permanently instead of chasing symptoms.
Understanding the Type of AC System You’re Working On
You can’t properly diagnose a system you don’t understand. The newer clutchless variable-displacement compressors behave completely differently from clutch-type compressors. If you don’t know the difference, you’ll make big mistakes that can even damage the compressor. Before I even hook up gauges, I identify the system type. This step alone separates professionals from most DIYers.
Clutch vs Clutchless Compressors
A Clutch-Style Compressor
• Uses an electromagnetic clutch
• Turns on and off when cooling is needed
• Easy to diagnose—if the clutch isn’t engaging, you start there
Clutchless (Variable Displacement) Compressor
• The pulley is always spinning
• A valve in the compressor moves a swash plate to adjust output internally
• No obvious “on/off” signal

If you don’t know which one you’re working on, you can’t properly diagnose your car’s AC problem.
For more information on clutchless compressors, see this article.
Refrigerant Metering Devices: Orifice Tube vs Expansion Valve Systems
Orifice Tube System
• Fixed restriction
• Uses an accumulator located near the firewall
• More sensitive to contamination
Expansion Valve System
• Variable flow control
• Uses a receiver/drier located near the condenser
• Provides more precise cooling control
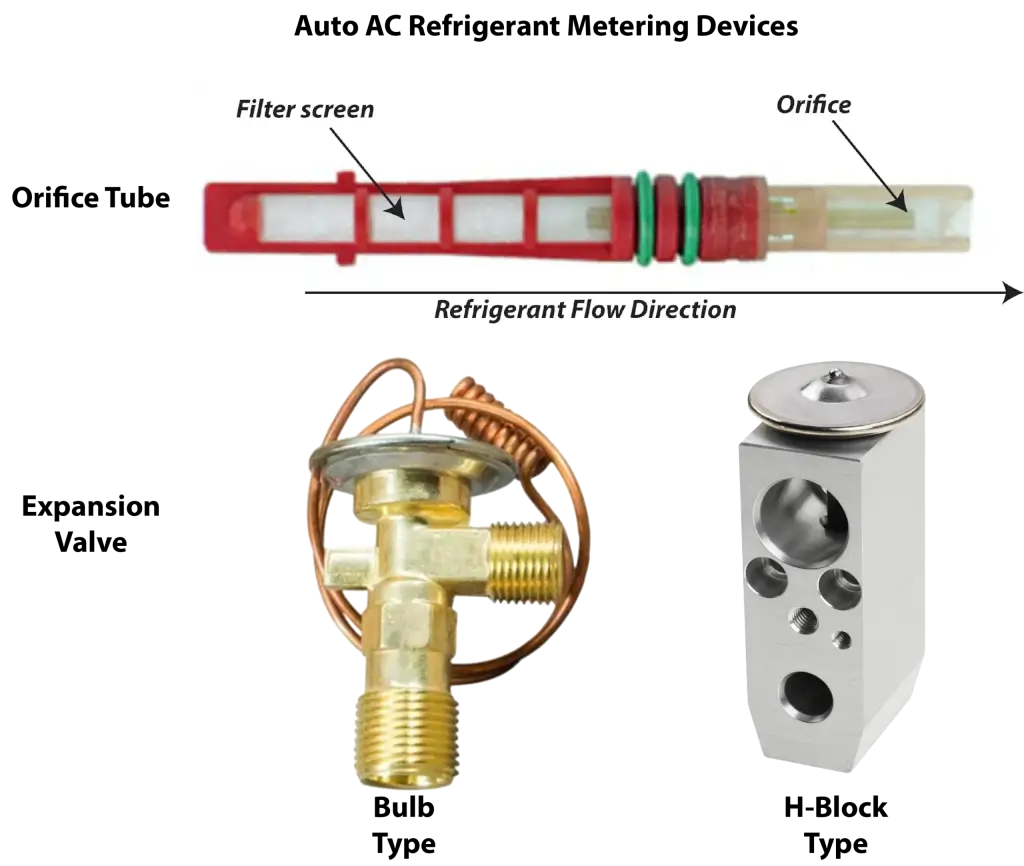
Knowing which type of metering device is used in your car is critical for determining which tests to perform and the most common failures for each type.
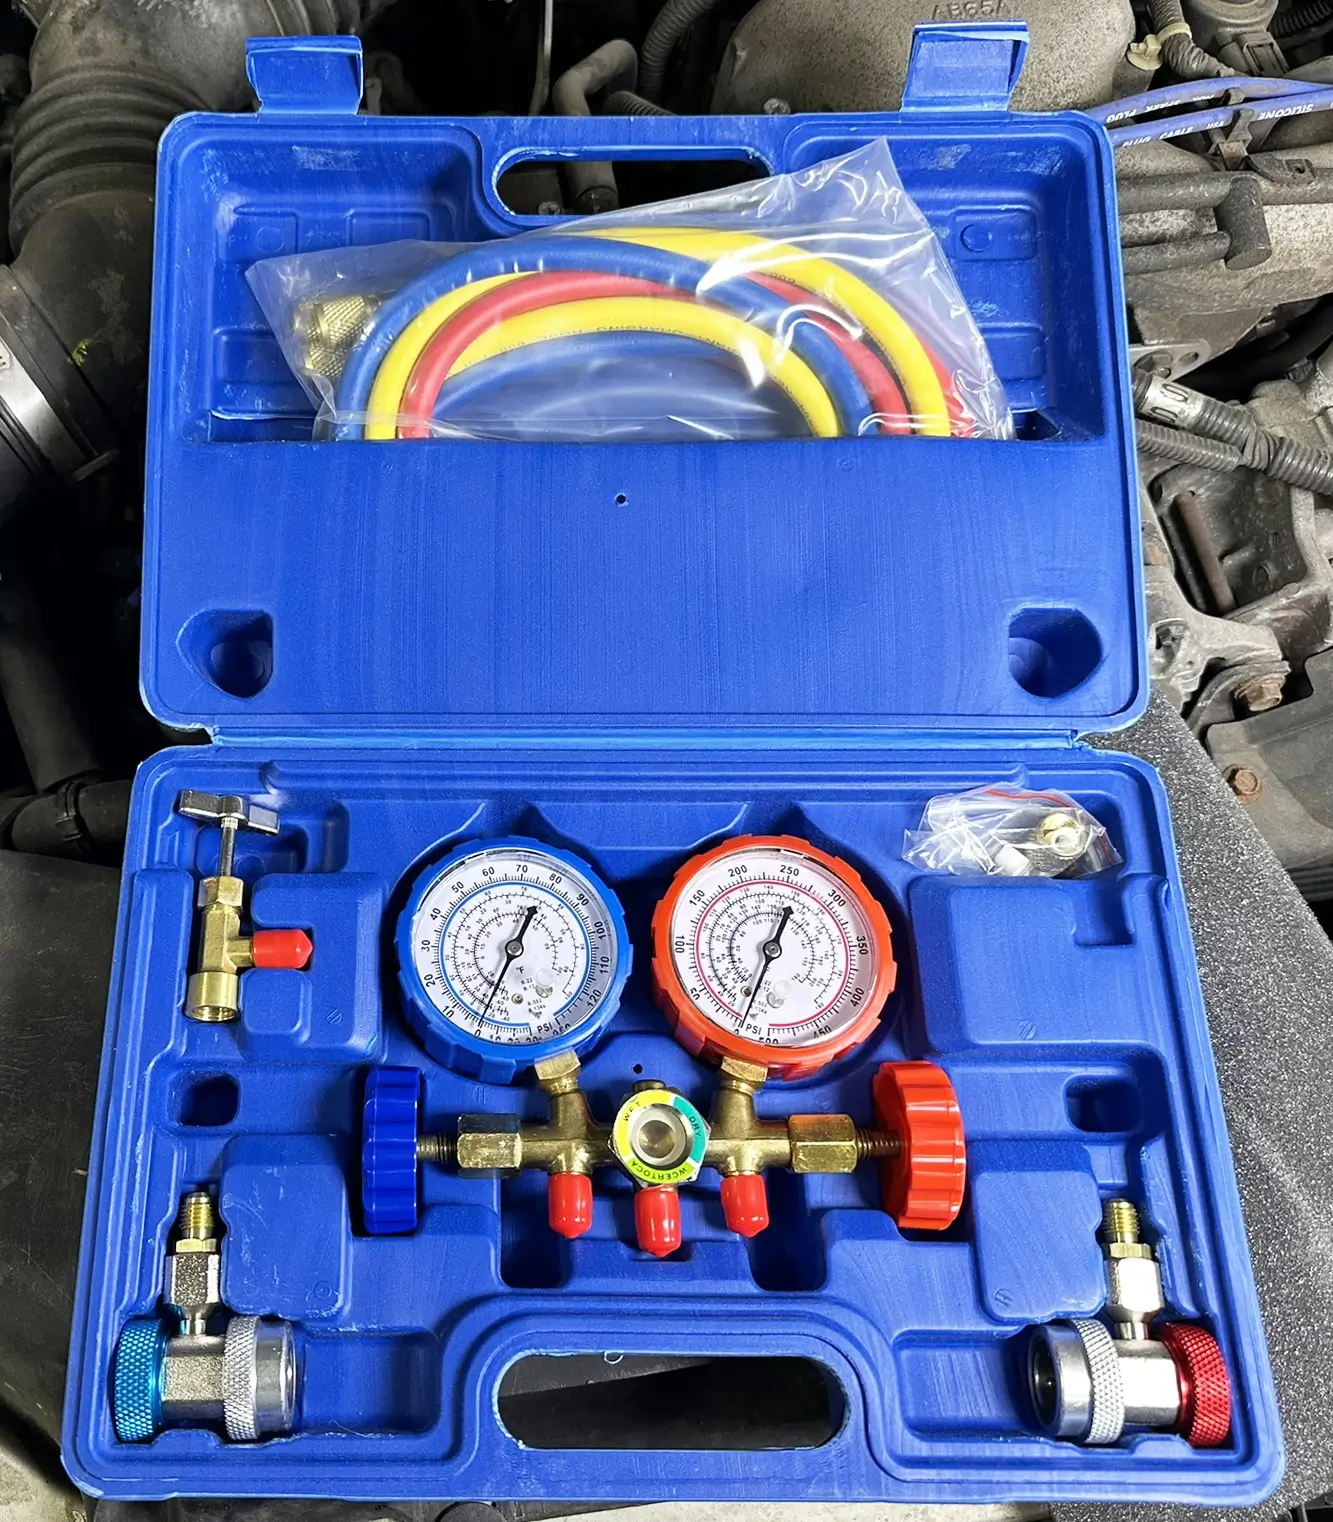
Rent or Buy the Right Tools
If you think your car’s AC just needs a bit more refrigerant, think again! Aside from finding and fixing leaks, diagnosing a faulty metering device, moisture and air in the system, or a faulty compressor requires testing. To do that, you’ll need the proper tools. You can get all these tools for less than $100. That’s a fraction of what you’d pay a shop just for the diagnostic.
• Manifold gauge set with hoses and quick-connect adapters — Reading system pressure is mandatory for diagnosing your car’s AC system. You can find inexpensive manifold gauge sets on Amazon.
• Digital Multi-Meter with thermocouple temperature probes — If you already own a meter that can accept a “K” style probe, all you need is the probe add-on.

Digital meter with thermocouple temperature probes
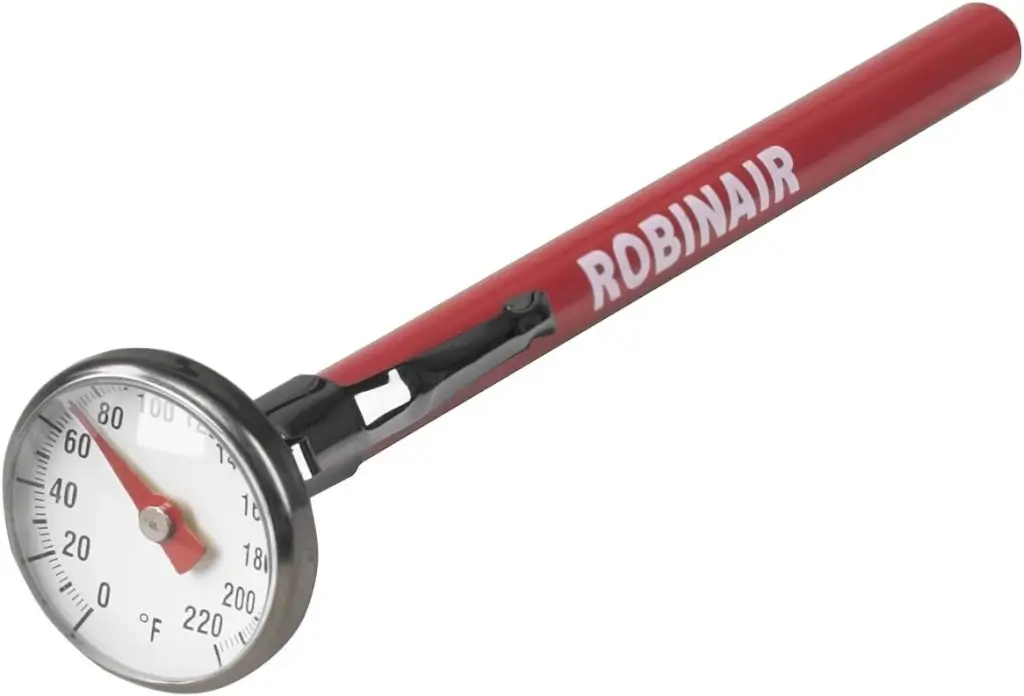
• Duct thermometer— You can use a digital kitchen thermometer or even an analog unit as long as it goes down to 30°F
My Step-by-Step Process to Diagnose Your Car’s AC Problem
Step 1: Identify Refrigerant and Oil Type— I identify the refrigerant type. Most older vehicles use R-134a, while newer ones use R-1234yf. If I’m working on a hybrid or EV, I’m extra cautious because they require non-conductive refrigerant oil. Using the wrong oil can destroy the compressor—or worse. Find refrigerant capacities and oil type and capacities using this chart. I always confirm:
• R-134a or R-1234yf
• Correct oil type (PAG, POE, etc.)
Get this wrong, and you won’t just fail to fix your car’s AC—you’ll destroy it.
Step 2: Verify Compressor Operation
Clutch system → Is it engaging?
Clutchless → Is it commanding displacement?
If the compressor isn’t functioning, nothing else matters yet.
Step 3: Check Static Pressure (Engine OFF)— This is your baseline.
What I expect:
• Roughly equal pressure on both sides
• Pressure corresponds to ambient temperature (Use a static pressure chart)
What static pressure tells me:
• Low static pressure → System is very low on refrigerant
• Normal static but poor cooling later → Mechanical issue likely
Step 4: Run the Engine and Check Operating Pressures
Now I connect a full manifold gauge set. This is where I really diagnose your car’s AC problem.
Normal Behavior (General Guidelines):
• Low side: ~25–45 psi
• High side: ~150–250+ psi (varies with temperature)
How I Interpret Pressure Readings Like a Pro
• Low Low-Side + Low High-Side — Undercharged system due to refrigerant leak
• High Low-Side + Low High-Side — Weak compressor
• High High-Side Pressure — Poor condenser airflow or Cooling fan issue.
Overcharge or restriction
• Low Low-Side + High High-Side — Restriction (orifice tube or expansion valve)
Refer to the following links for normal and abnormal pressure readings, as well as possible causes of abnormal AC pressures:
• Abnormal AC Pressure Readings and Possible Causes
Step 5: Temperature Testing (Critical Step)
I don’t just check vent temps—I check:
• Evaporator inlet/outlet
• Condenser temperature drop
• Line temperatures
This helps me confirm:
• Restrictions
• Heat transfer efficiency
• Refrigerant flow issues
Step 6: Superheat Testing (Advanced but Powerful)
Perform a Superheat Test. Here’s where most DIYers stop—but I go further. I run a superheat test to precisely diagnose what’s going on inside the system. Superheat readings tell me far more than pressures alone. They reveal if your expansion valve or orifice tube is clogged or if your evaporator is starved of refrigerant.
If you skip this step, you’re taking a chance. When I use superheat testing, I know exactly what’s wrong—and how to fix your car’s AC for good.
Click here to learn what superheat is and what it can tell you about your car’s AC problems.
- How to Test Superheat on an Expansion Valve System
- How to Test Superheat Load on an Orifice Tube System
By following these steps and using the proper tools, you can pinpoint the problem and fix the issue causing your car’s AC to blow hot air. Then, use these articles to learn how to fix/replace the component permanently, saving you time and money.
Superheat tells me:
• If the evaporator is being properly fed
• If there’s a restriction
• If the refrigerant flow is correct
Most DIYers skip this—but this is how I confidently fix your car’s AC the first time.
Refrigerant Oil: The Most Overlooked AC Killer
This is where I see even experienced techs make mistakes.
Why Oil Matters
• Lubricates the compressor
• Carries heat
• Protects internal components
What Happens If You Get It Wrong
• Too little oil → Compressor failure
• Too much oil → Reduced cooling efficiency
• Wrong oil type → Electrical or mechanical damage
And here’s the key point: When refrigerant leaks out, oil leaks with it.
So when I fix your car’s AC, I always:
• Measure oil loss
• Replace oil correctly
• Follow manufacturer specs exactly
Why You Should Never “Just Recharge It”
Let me be blunt—this is the fastest way to ruin a system.
When you add refrigerant without fixing the leak:
• There’s always moisture and air in the system when you’ve lost refrigerant due to a leak.
• Moisture and air mix with the refrigerant and oil to form acids and sludge.
• Moisture and air cause internal corrosion
• Acids and sludge cause compressor damage, clog the metering devices, and reduce cooling.
That’s why I always diagnose your car’s AC problem first, then repair it properly
How I Actually Fix Your Car’s AC (Final Step)
Once I identify the root cause, I:
• Repair leaks
• Replace failed components
• Flush contamination if needed
• Evacuate system (remove air/moisture)
• Recharge with exact specs (refrigerant + oil)
That’s how you fix your car’s AC permanently, not temporarily.
Why Acting Early Saves You Thousands
Every AC problem starts small:
• Minor leak
• Slight performance drop
Ignore it, and you’ll end up replacing:
• Compressor
• Condenser
• Expansion device
Act early, and you can often fix your car’s AC cheaply and quickly.
Final Thoughts From My Experience
After years of doing this, I can tell you this: Anyone can learn to diagnose your car’s AC problem—but very few people follow the process.
If you:
• Use gauges
• Read pressures correctly
• Understand system types
• Respect refrigerant oil
Then you won’t just fix your car’s AC—you’ll fix it the right way the first time.
©, 2020 Rick Muscoplat
Posted on by Rick Muscoplat